Mac-in-mac Old Mac is revised with Mac Mini in it
I recently obtained a Mac mini (early 2006) to make programes for iPhone.
While it is intel Mac, it is one of the very early model and costed me only $200.
I replaced Core Solo with Core2Duo T-7200 which is obtained for $50 and
increased memory to 2GB which is found in my junk box and the maximum for this model.
I once replace HDD with 60GB SSD. It is fast but had many troubles and it makes
Mac can not recognize the SSD and I had to disassemble Mac mini evrytime
to initialize SSD which is not good at all. As the recult I replaced SSD with 500GB HDD to avoid
that annoying problem. Since 500GB is much more than I need I partioned it into two 250GB
each one for OS and the other for data. The partioned part could be used for Timemachine backup.
It can not be used for Bootcamp however, the current version of Bootcamp requires HDD
which has single partion and as the first drive. I believe former versions could be installed
to USB HDD but not the current one.
After I installed Snow Leopard which is the latest version I can install for this logic board
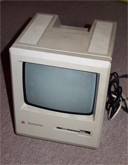
I decided to put it in old Macintosh body which I happen to had three of them.
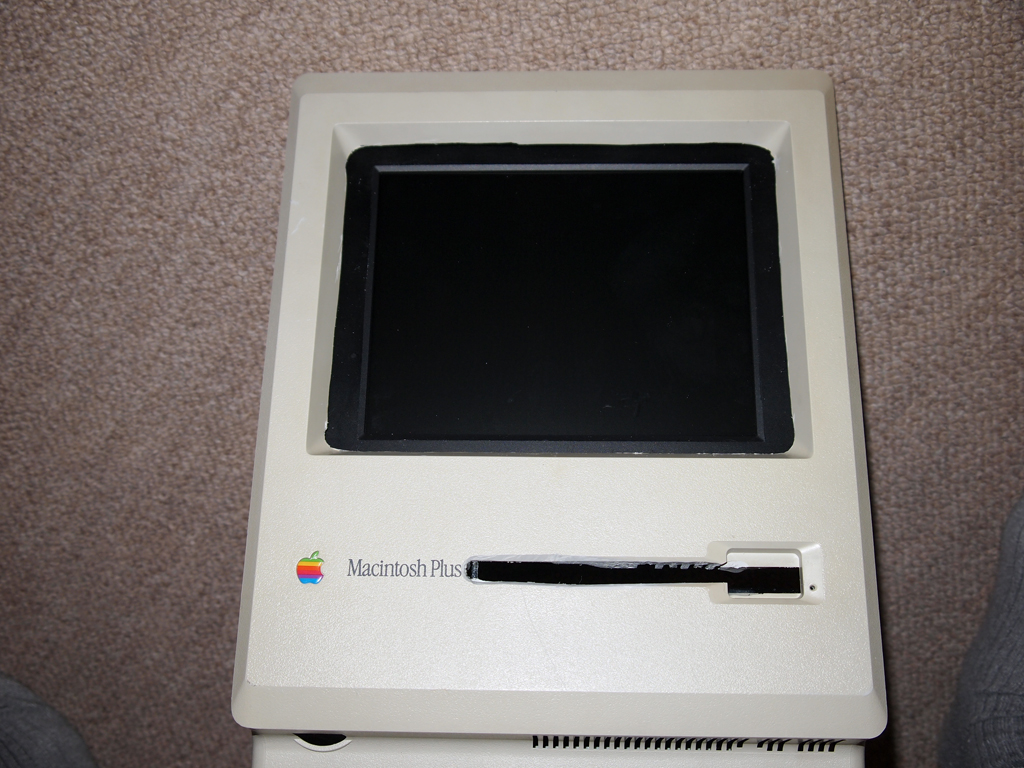
I could not find the first Mac and the latest one was Macintosh Plus.
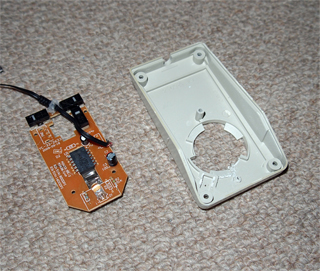
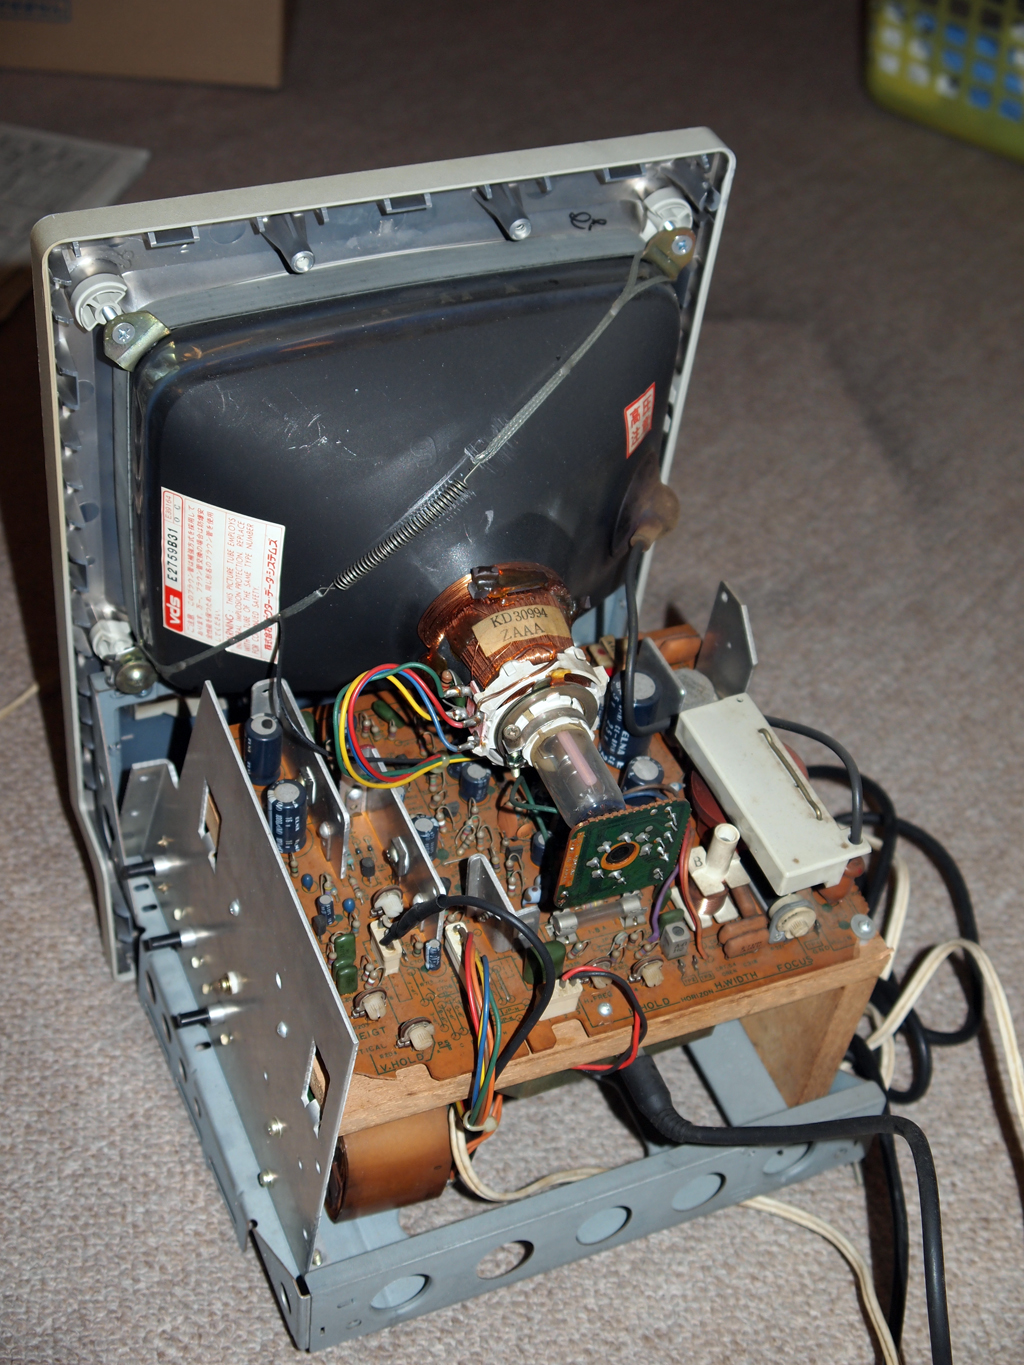
BODY
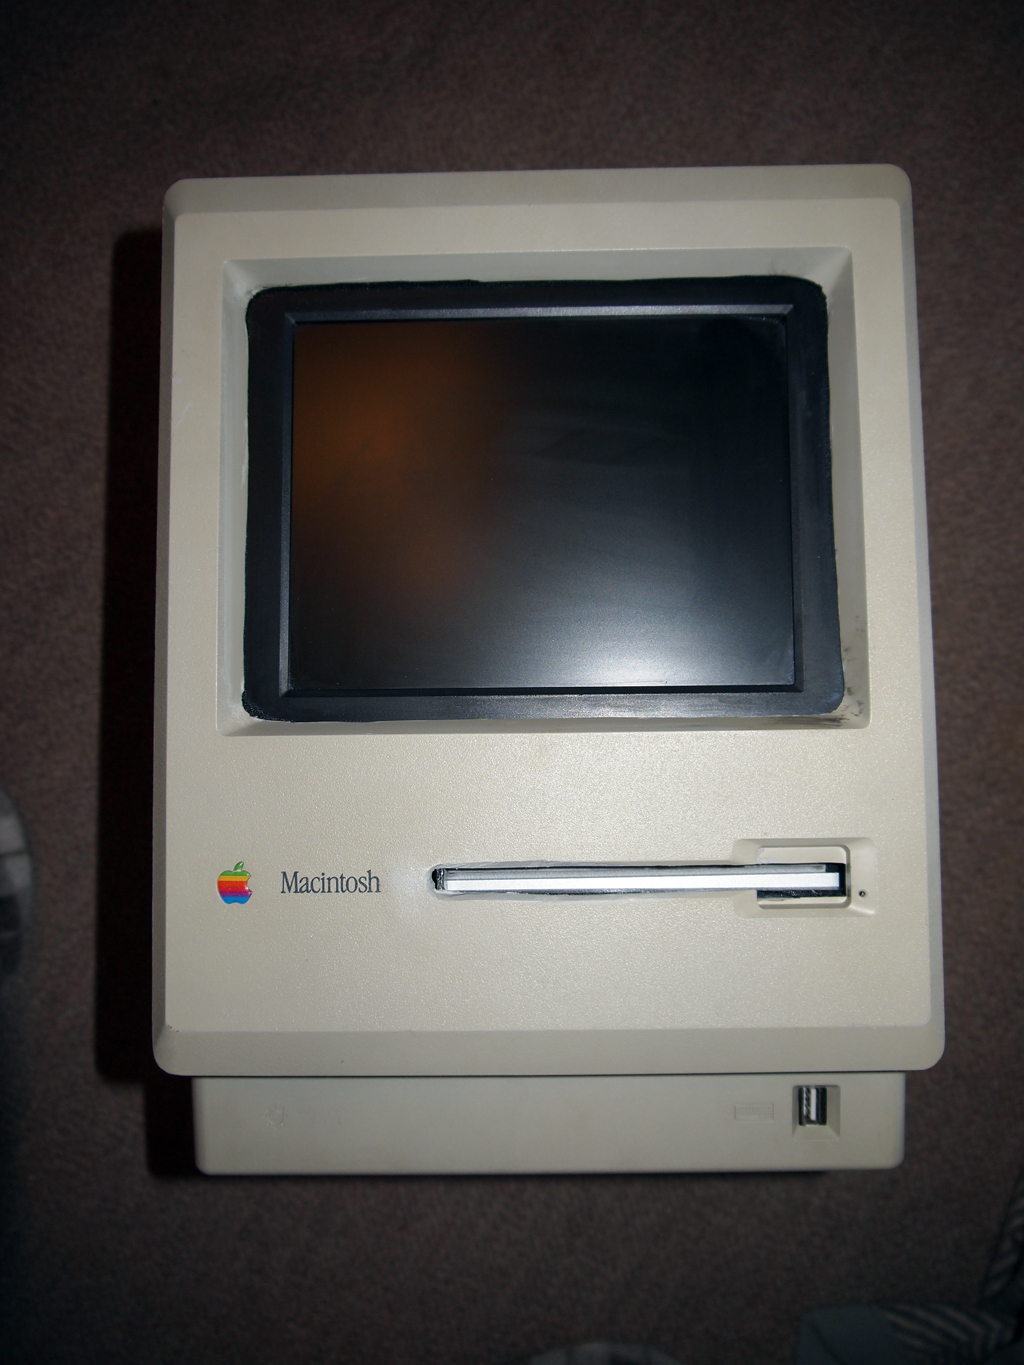
I found three Macintosh including Mac SE and Mac Plus J in my warehouse. I choosed Mac Plus which is the earliest model I had. This is basically the same body to first Mac but it's apple logo is different from the first one. I got this body at an US computer shop just body nothing inside. I put JVC 9inch green CRT monitor in it then.
| Components of the Body |
 |
I put it in the warehouse for decades and the body is covered with dusts and a npart of the side of the body is turned into yellow. Fortunately the front panel was in original color.
|
 |
I used to put this JVC CRT in it and used with Apple-][.
|
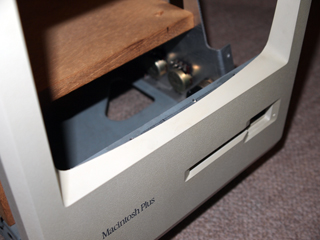 |
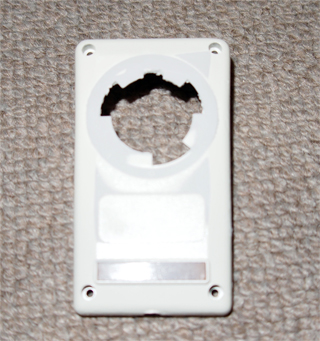
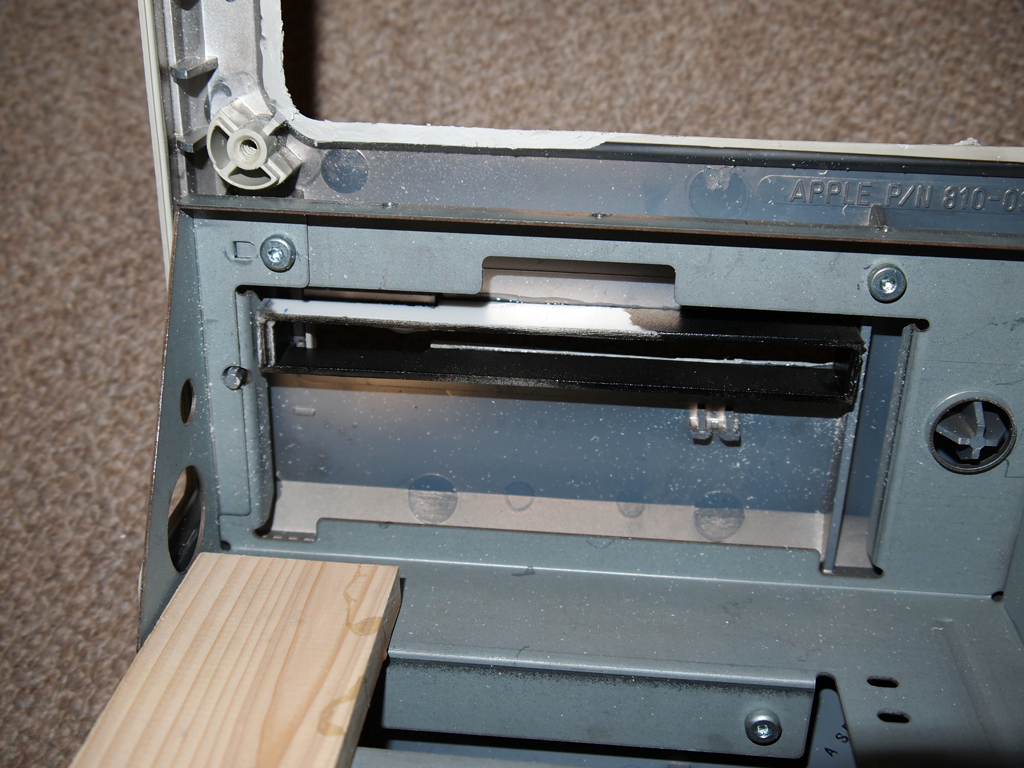
There were two places I need to modify.
First, I need to cut curved CRT holder to make it stragiht since LCD's surface is flat not like CRT.
Second, I need to make floppy disc slot wider to be used as CD/DVD slot.
|
| CD/DVD Slot |
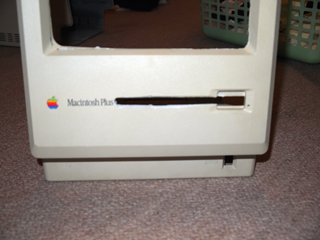 |
The floppy disc slot was widened with router. The power of the router is a little bit too high and the slot does not look perfect.
|
 |
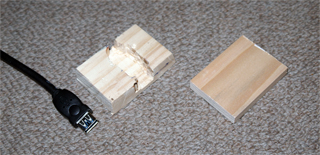
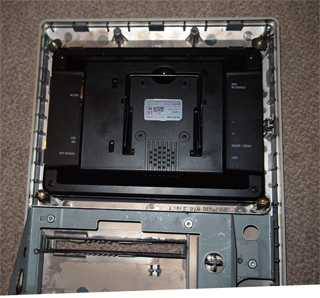
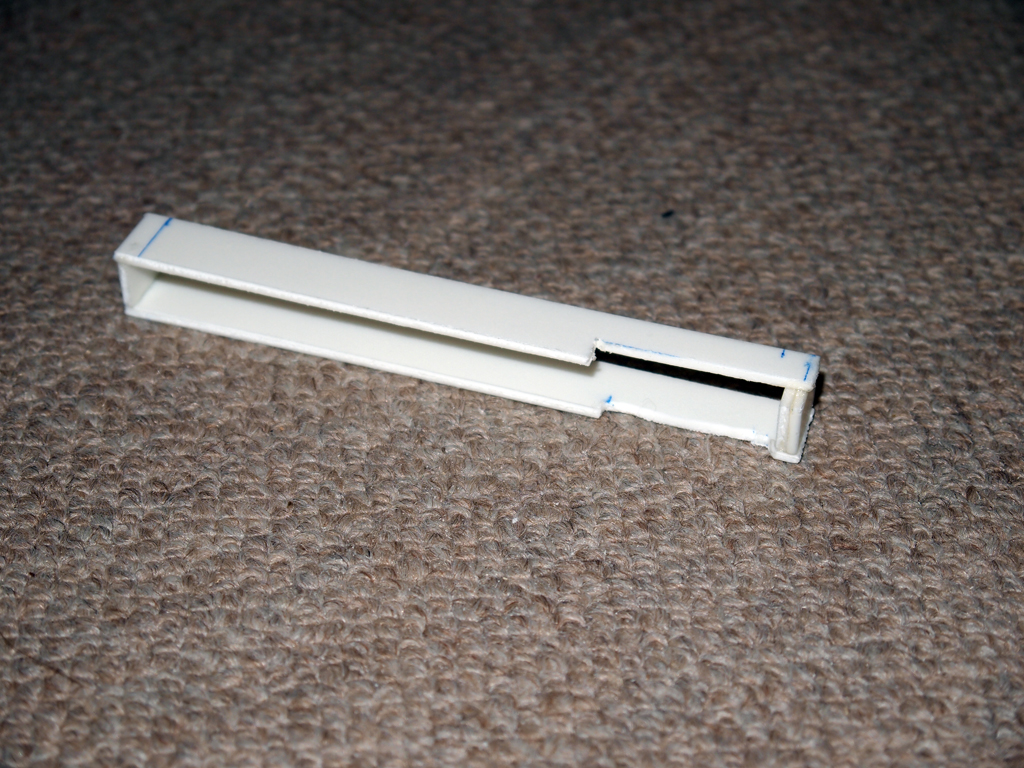
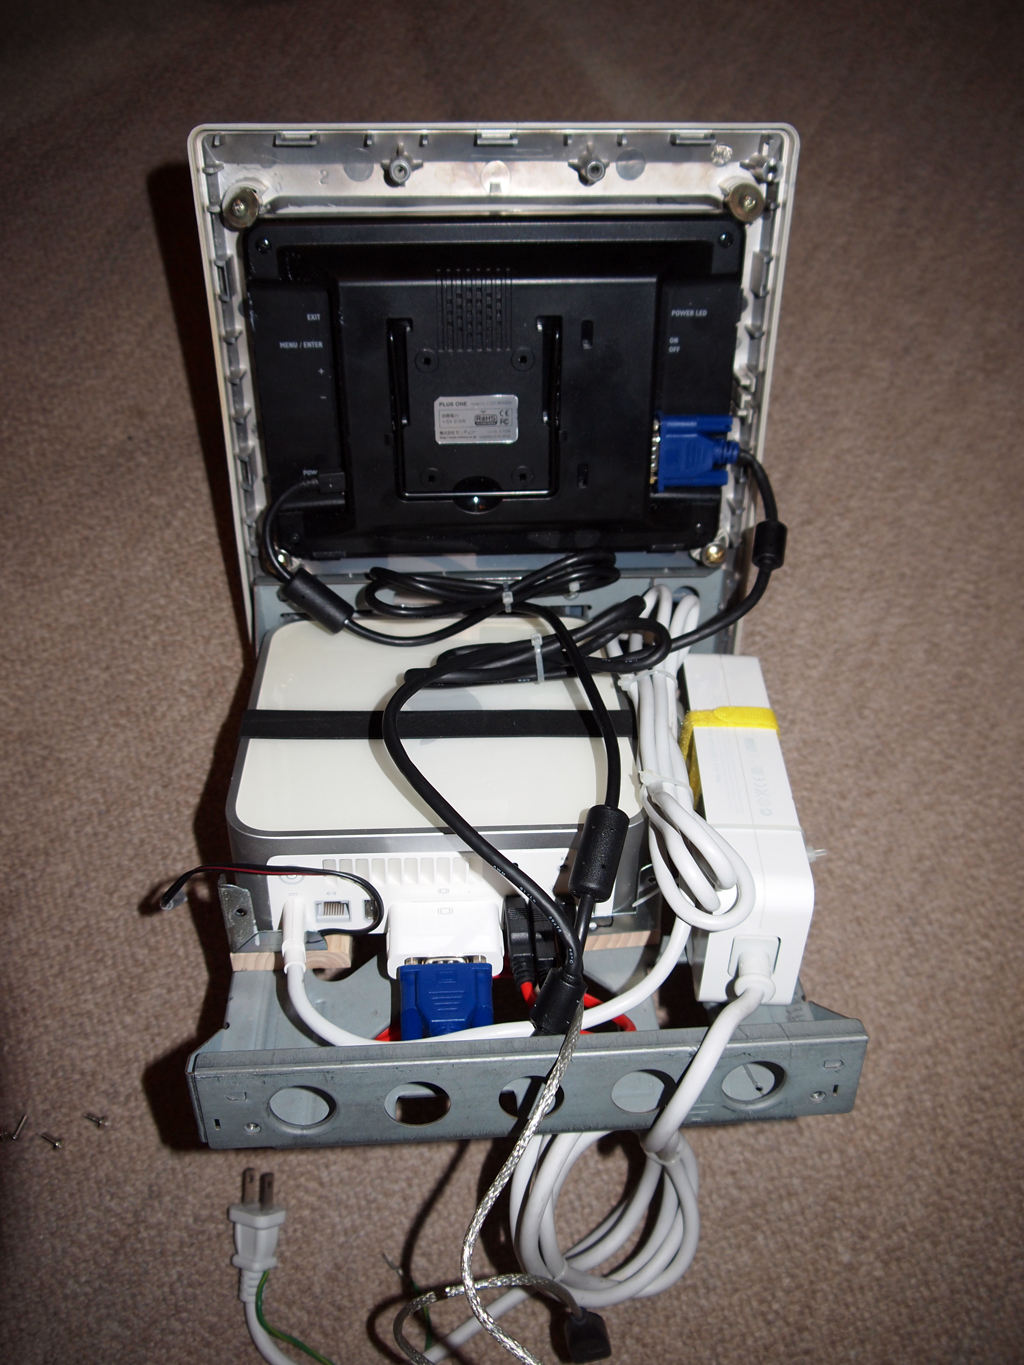
I did not want to work with iron frame and Mac mini is placed away from the front panel. I made this duct from plastic board by Tamiya to fill the space between Mac mini front panel and body's front panel.
|
 |
The inside of the duct is painted in black and fixed with epoxy.
|
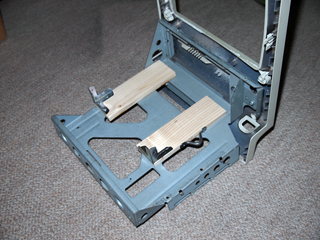 |
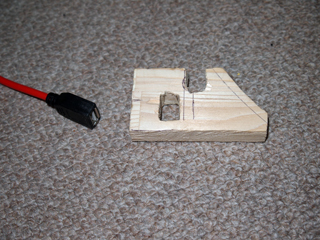
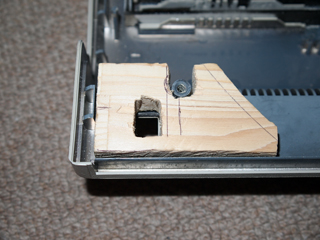
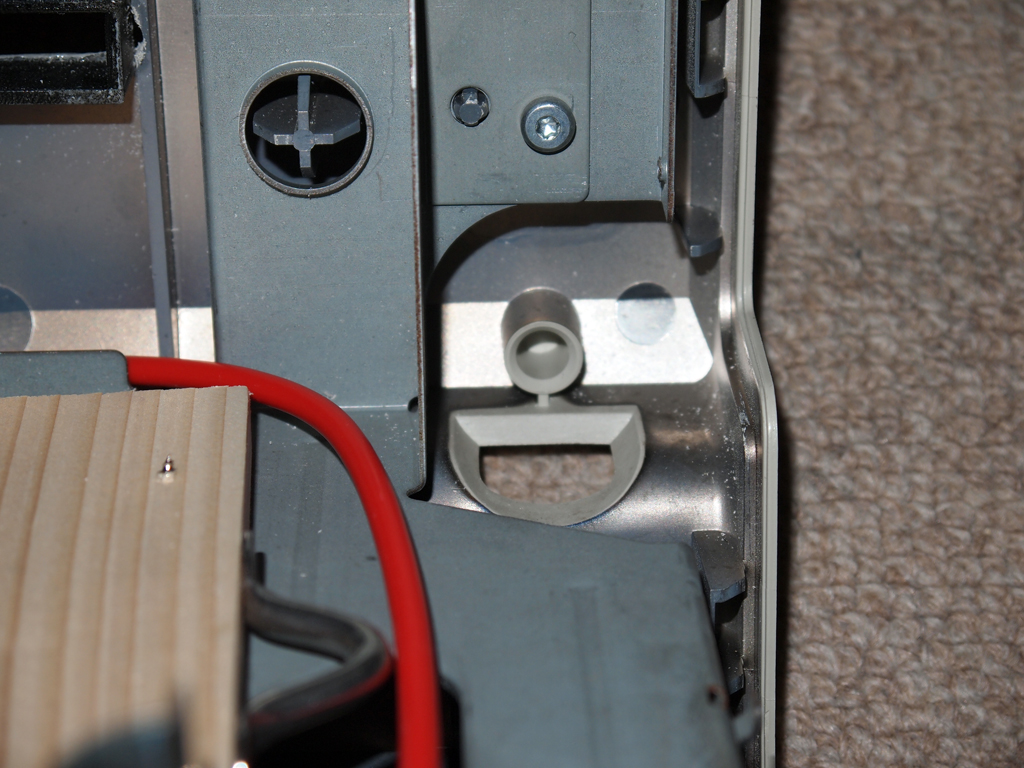
Mac mini is placed on 9mm thick wooden board to make the CD slot is located to that of the body. A hook is attached to the right side of a panel to be used by rubber band to fix Mac mini.
|
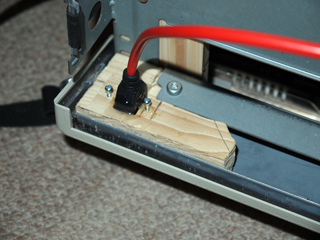
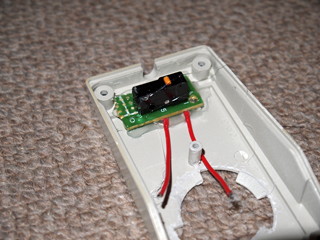
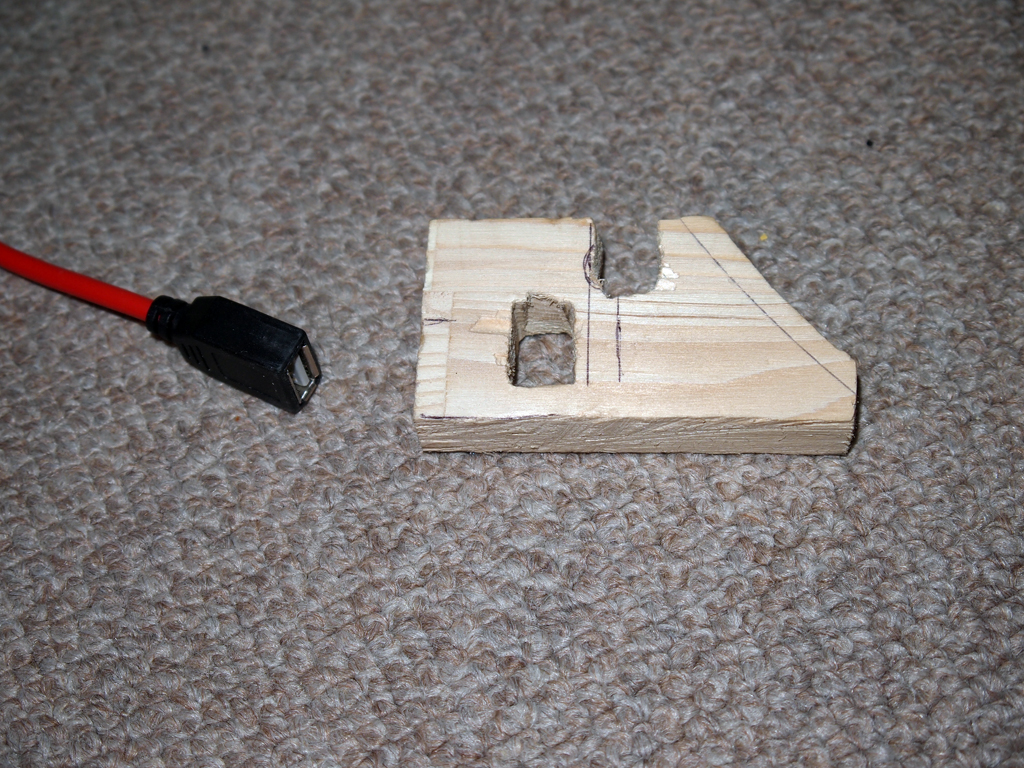
| Keyboard Connector |
 |
USB keyboard connector uses tthe ADB connector hole.
|
 |
Wooden base has a hole to fit the USB receptacle of an extension cable.
|
 |
The wood base is attached to the body's front panel using epoxy.
|
 |
The base panel is also pressed by the iron frame so it is firmly fixed. The USB connecotr is fixed with epoxy too. Epoxy pate will be used to fix it more firm and small screws are used as anchores.
|
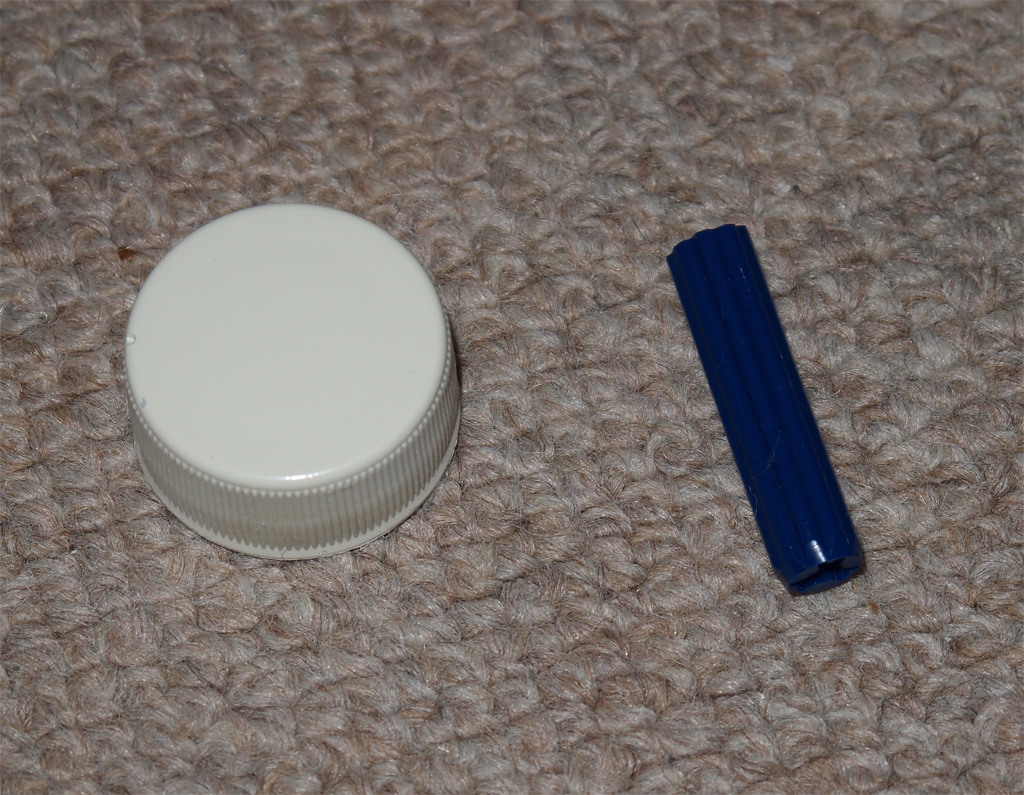
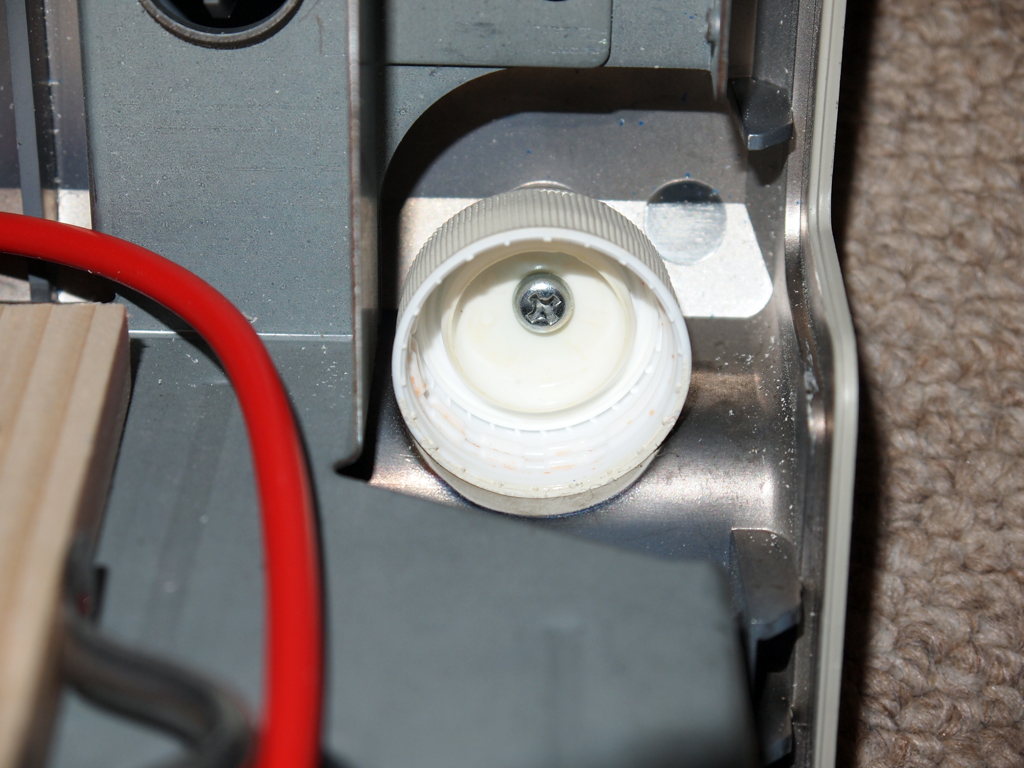
| Brightness Control Knob |
 |
There is a brightness control knob in front which I do not have.
|
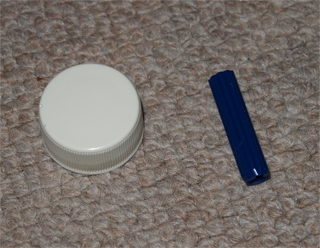 |
I found the cap of a PET bottle fits for the purpose. The knob is fixed with a screw and acrew holder plastic plug. Since the cap is made of polyethylene paint does not fix well, but it does not to be used and need not worry abiot the ware.
|
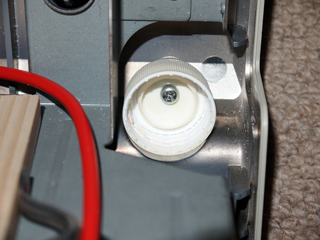 |
Plastic plug is cut and put into the body's hole, and the knob is fixed with a screw.
|
 |
The cap painted in beige fits perfect. The color is slightly different from that of the body, still it looks OK.
|
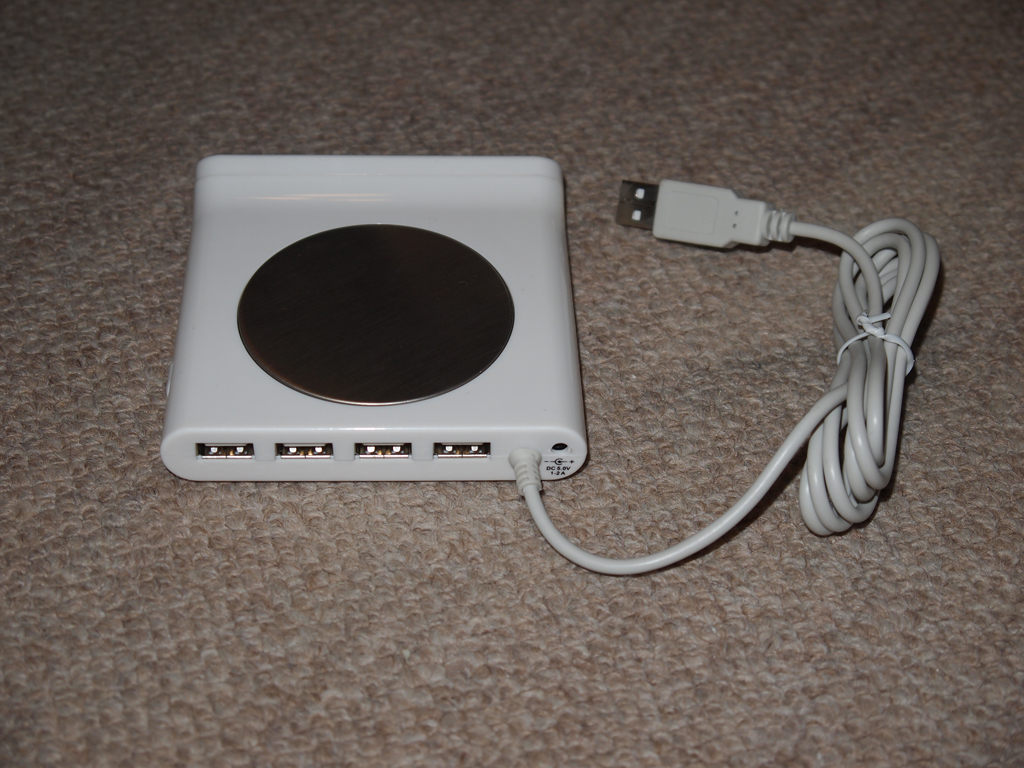
| USB Connector |
 |
I purchased this USB hub with 'Coffe Cup Warmer' and LCD clock with separte battery at Akihabara for several dollars. I never used it and it is a good chance to use it for Macinmac for extra USB ports unless otherwise I will keep it in my junk box for the rest of my life.
|
 |
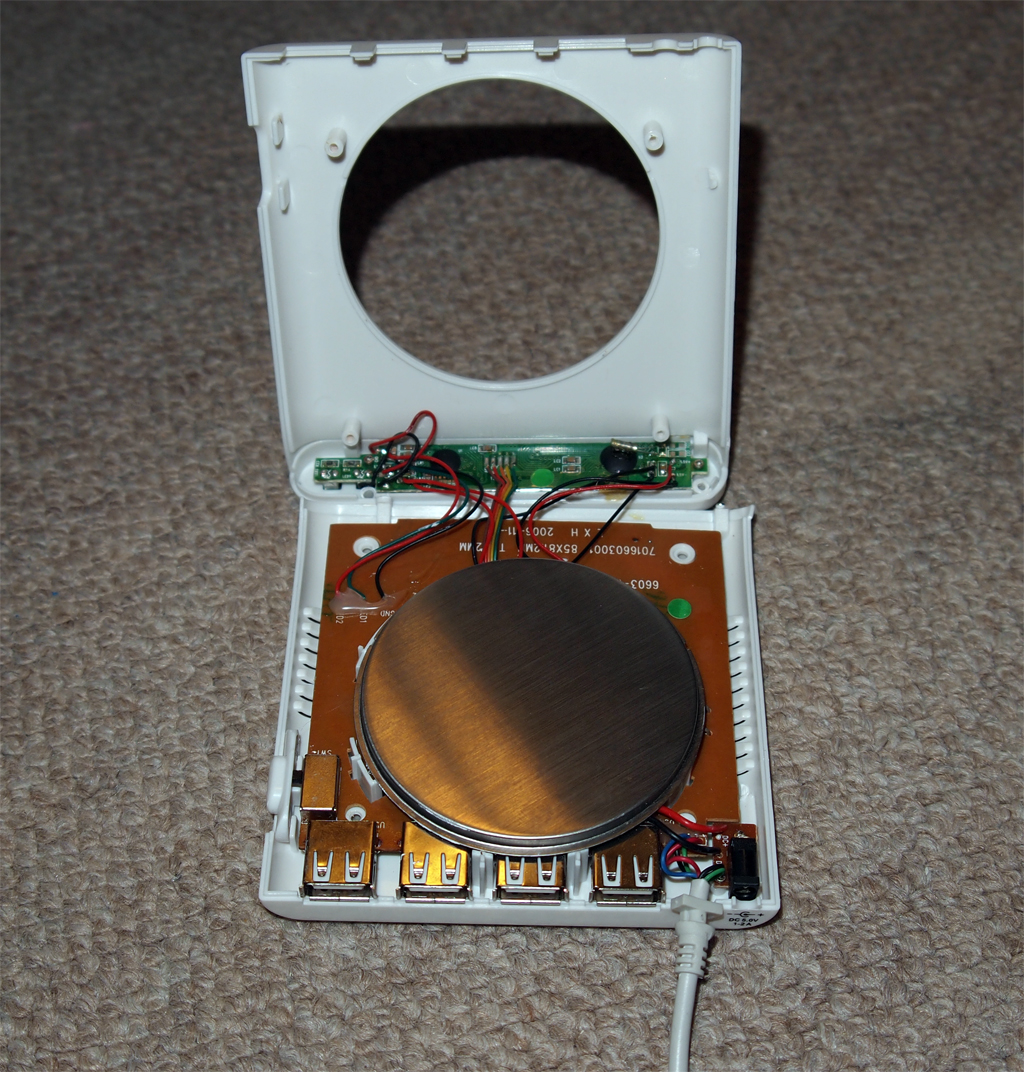
Removed the top cover which I do not use. |
 |
Heaters were removed completely to avoid un-intentionnal heat. Also clock wirings are removed along with clock itself.
|
 |
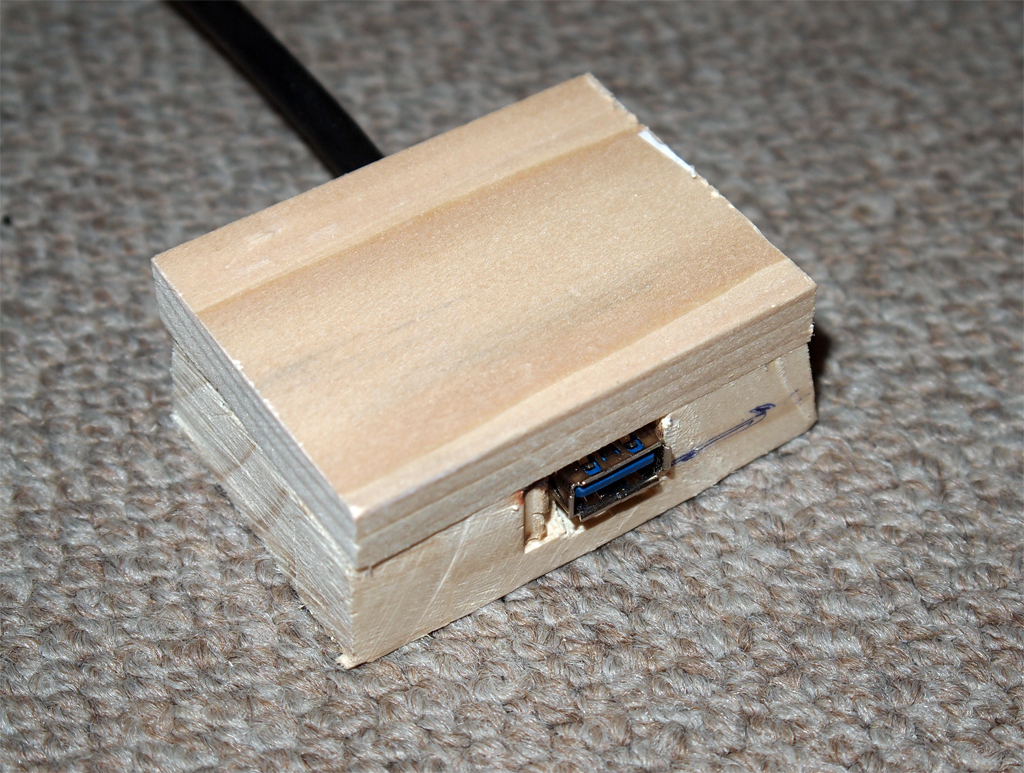
Another USB single port was installed which is directly connected Mac mini for some deveices which do not work with a hub.
A set of wood board is prepared to accept the connector.
|
 |
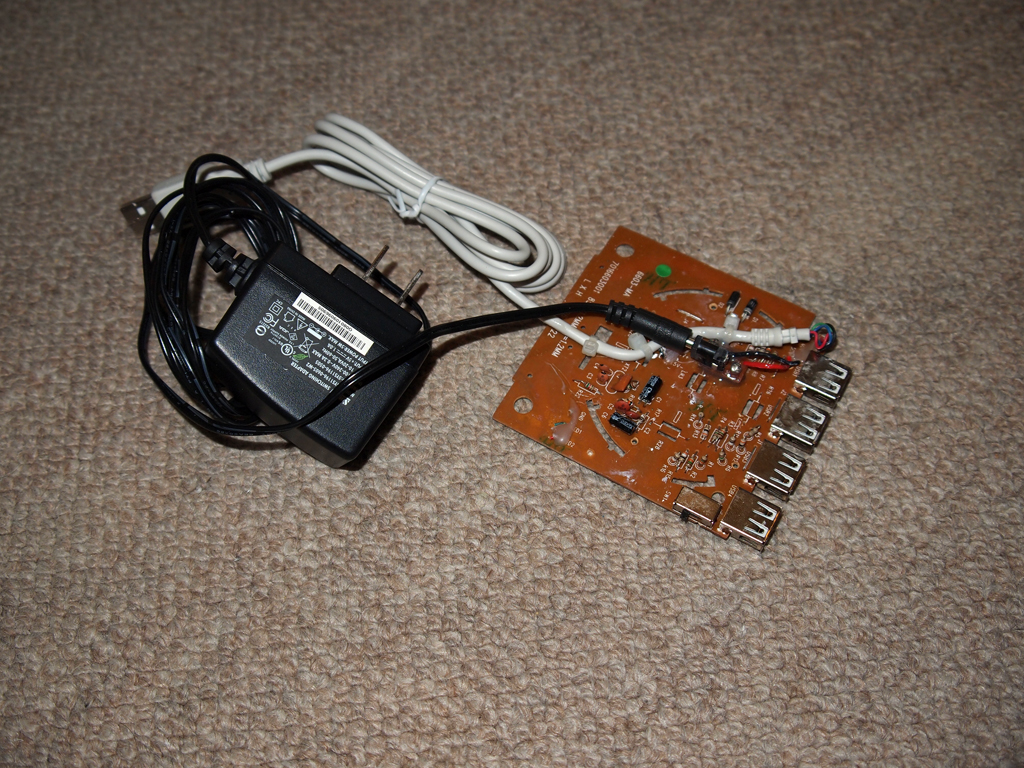
The connector is firmly fixed with hot melt and the top cover was placed. Unfortunately it was revealed that the top cover does not fit into the body and I neede to remove it. The bottome blate was fixed to the bottome of the body.
|
| |
|
| Power Switch |
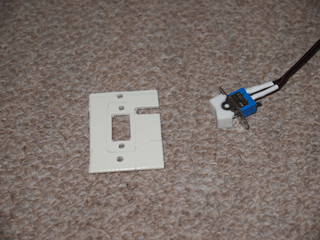 |
Mac mini's power seitch is a momentary tyoe. Irtried toi find the momentary switch that is similar to the original in size. But I could not find it and ended up with smaller switch as seen in the left picture. I made a plastic atachment plate.
It is getting harder to find exact component these days.
|
| |
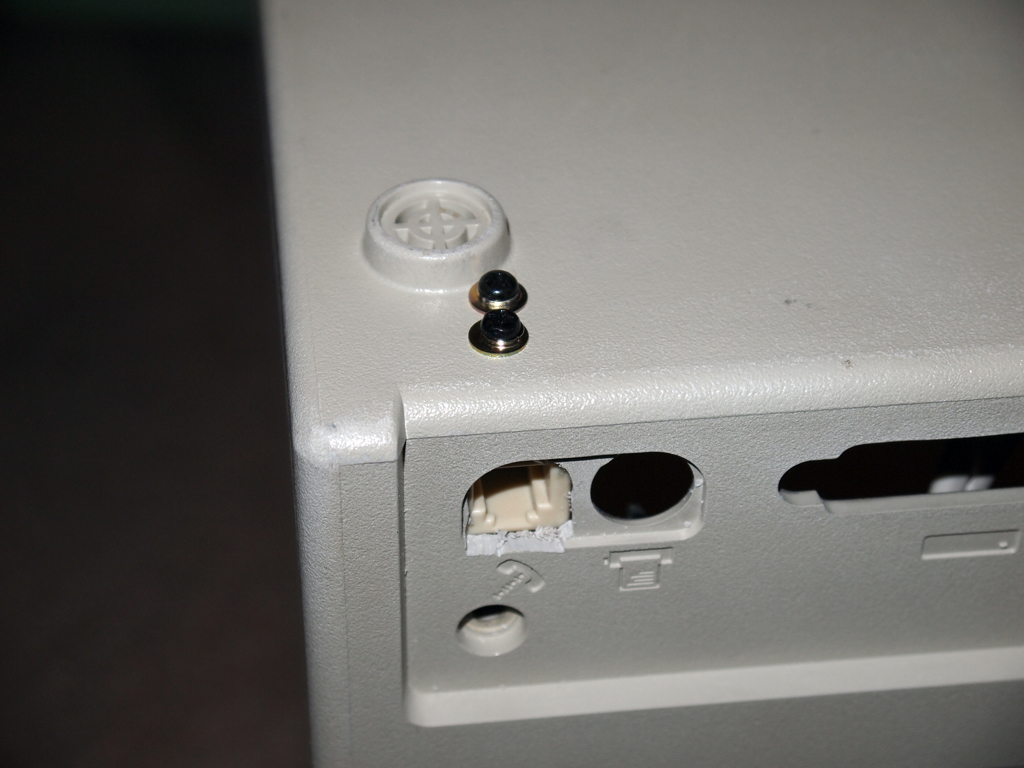
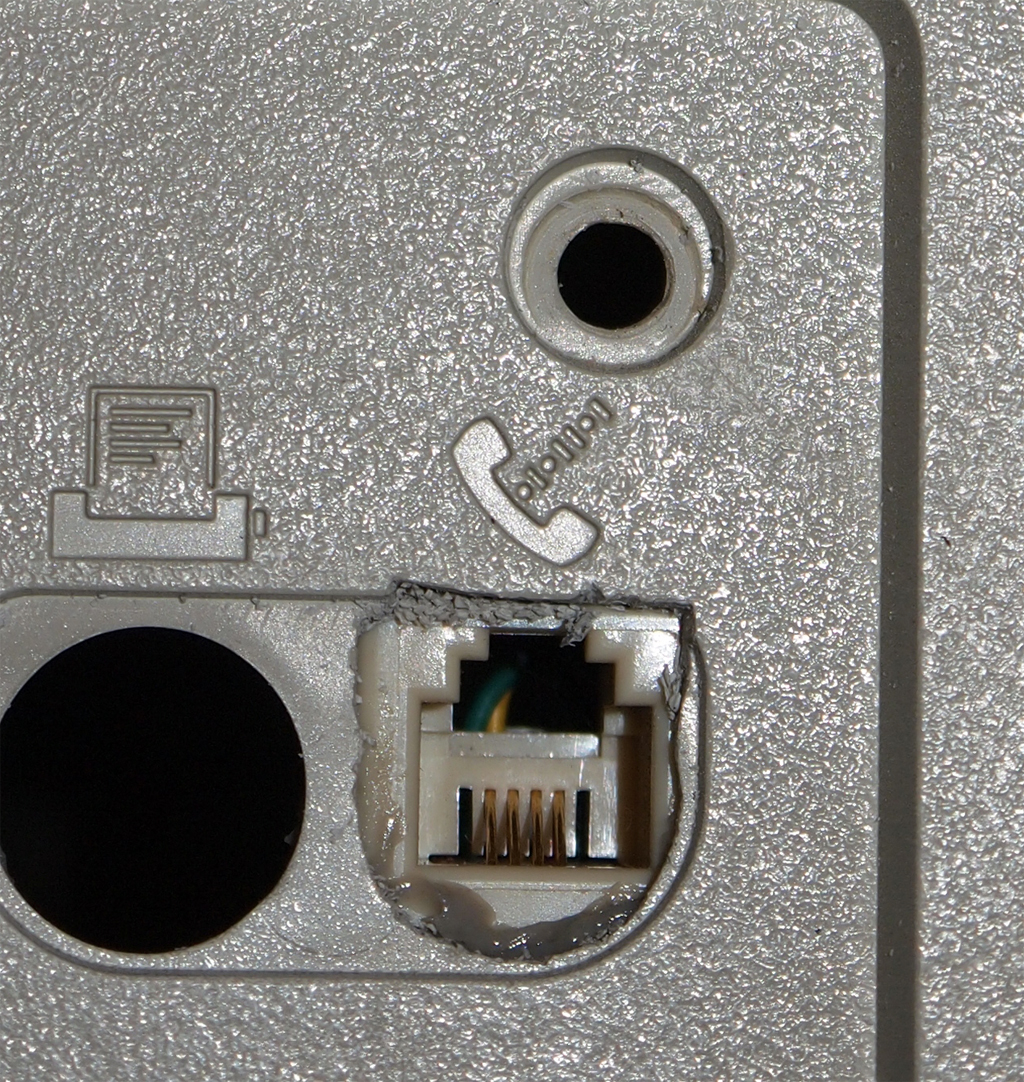
| LAN Connecotr |
 |
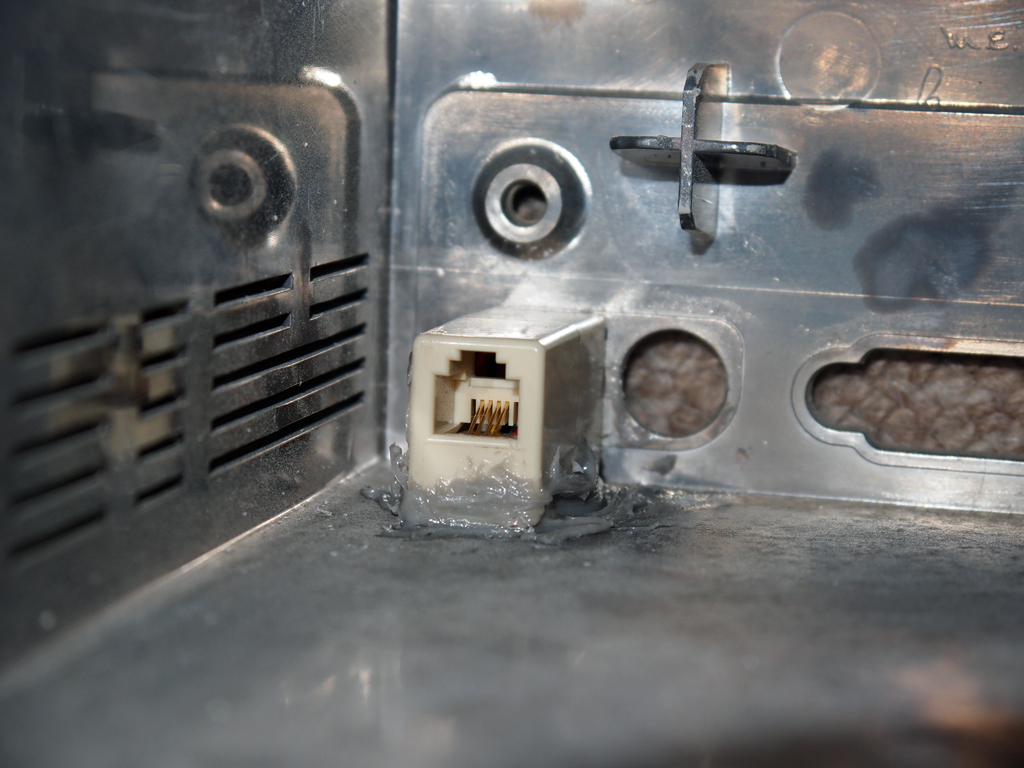
I used a LAN connecting adapter to set a LAN connector in the backplate of the body. Short LAN cable from this connector goes to Mac mini's LAN port.
|
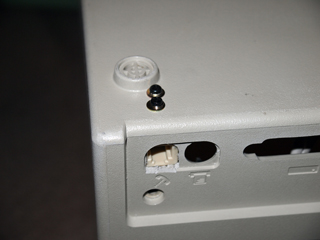 |
Connectors are tend to be pulled with strong power as when you tripped the cable. I put two self tap screws to hold them tight as well as epoxy.
|
 |
This is the back view of the connector. Original hole were too small to accept LAN connector and were made bigger. |
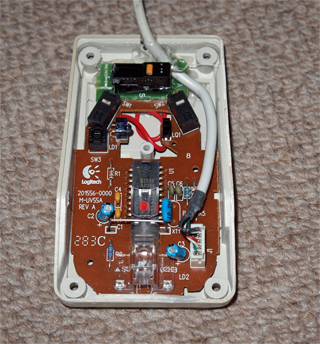
| Finished Body |
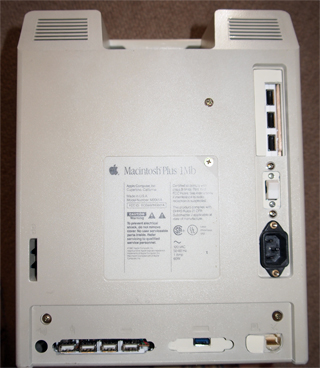 |
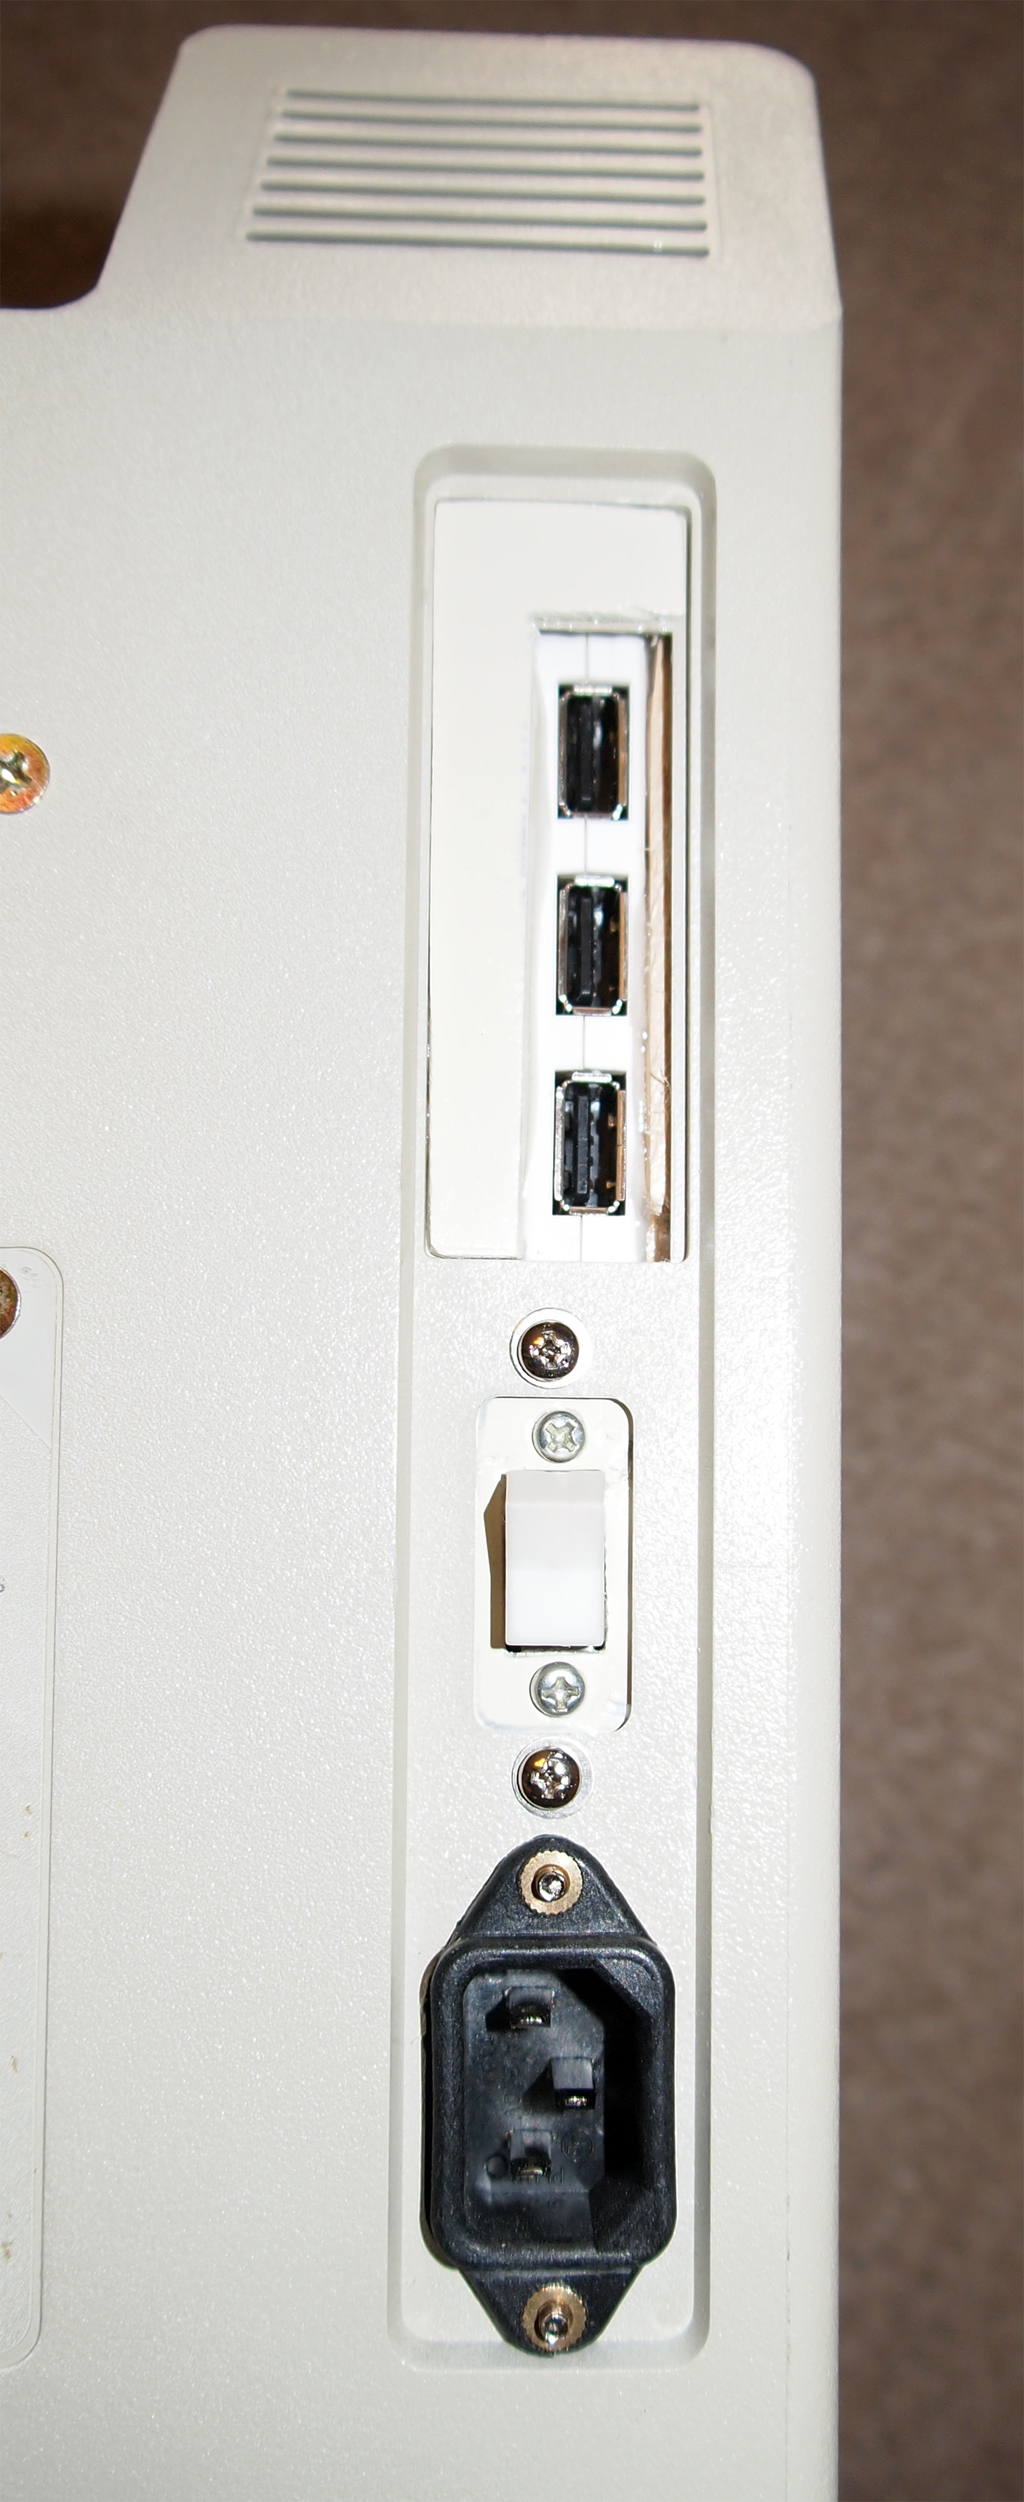
Here is the body completed in the back.
At right from the top are three bus powered USB 2.0 ports, power seitch and AC inlet.
At the bottom from the right are LAN connector, USB direct port and four USB 2.0 self powered hub.
|
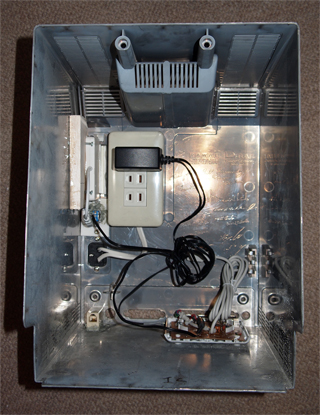 |
Inside view fo the back body. You may be surprised to see AC receptacles built in. Since CRT is replaced with thin LCD, there is a plenty of space and I did not want to cut beautiful AC cable of Mac AC adapter. USB hubs are fixed with epoxy and screws.
|
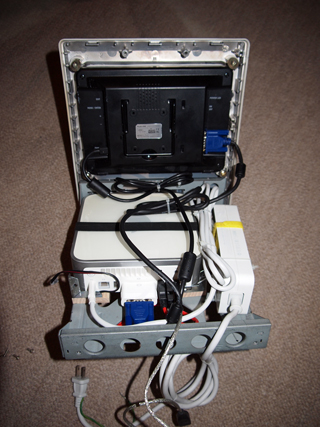 |
This is back view of the front body and frame. Mac mini is fixed with wide rubber band to the frame and AC adapter is also fixed with a band.
I could not find right angle DB15 connector for LCD and the cable must be bent in sharp angle to be fit into the body.
|
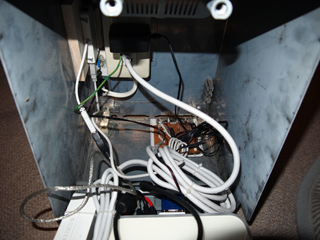 |
There are several thick cables from front to the back of the body. They must be treated carefuly or rear body can not be attached properly.
|
 |
This is the result of time consuming work while it does not look like that. I am trying to think it is because it is well made and natural.
|
| |
|
| |
|
 |
You may noticed that the word "plus" nolonger exists. I was supprised that paint thinner could remove it completely. At the time logos are printed with paints not burnt in. |
|
I modified Macintosh logo to make Macinmach logo.
|
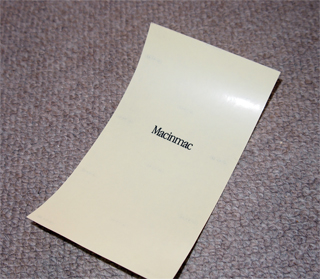 |
Above logo is trimmed to get the right aspect ratio and printed on transparent paper with Laser priner. This print is going to be used to make silk screen plate which is not yet done.
|
| |
|
| |
|
DISPLAY
I bought chap $150 7 inches LCD. It has clean display and the power is supplyed via USB port so I do not
need any AC adpter for this. The siganl from Mac mini's DVI connector is converted into DB15
by an adapter. Original Mac had 9 inches CRT and this is 7inches LCD and
there is black fringe around the screen. However this does not bother since
CRT does not disply full screen while LCD does, as a result actual display areas are not
different as the number tells. What mattered is the maker's logo and model number which
were seen from the front. I sanded out them and paint the basel in black.
|
Four original screw holes to hold CRT were also used to hold LCD. Bottome poles were slightly trimmed to fit the LCD in it and big washers and screws hold LCD firmly. Thre were no need of hot melt.
|
 |
This is front view of the display. I could not finish the edge of the body cut into perfect straight and there are some jaggies noticable.
|
| |
|
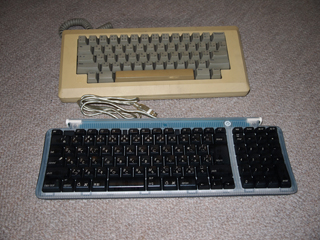
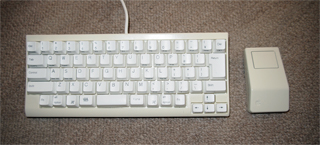
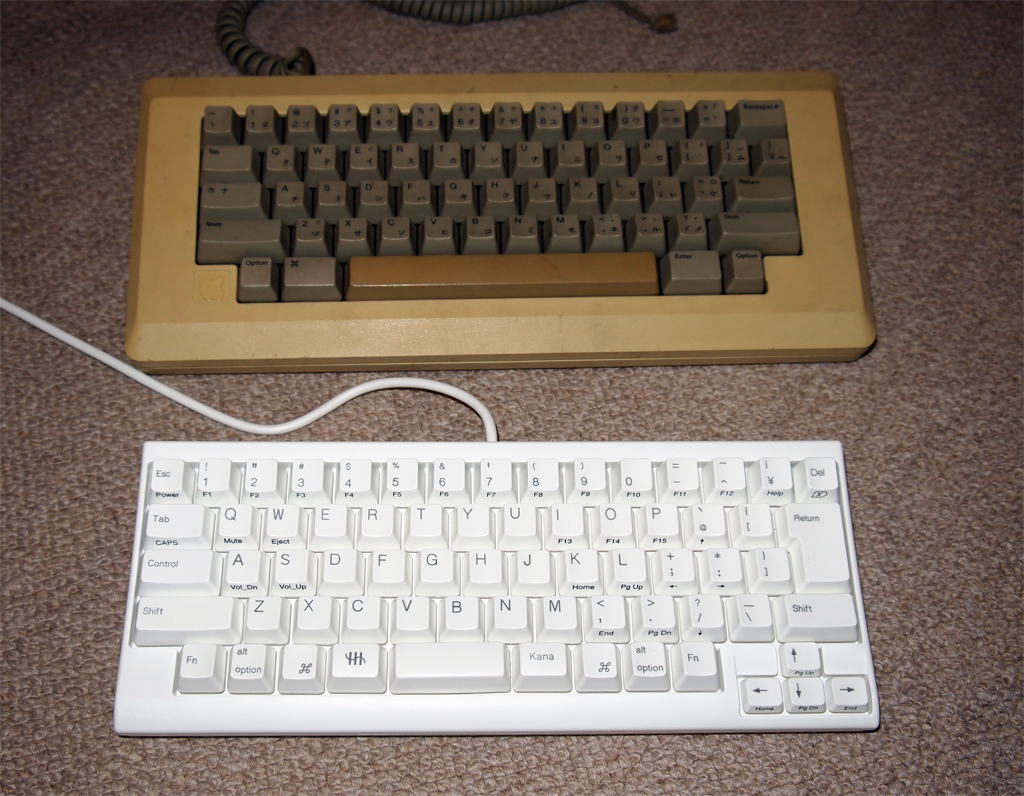
MOUSE
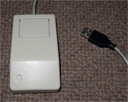
I wished to use original Keybord and Mouse for Macinmac as the memory of old time.
However original keyboard has an interface called ADB wihich is not compatible to USB.
Even worse, the original keyboard lacks several keys which are standard to modern keyboard.
I obtained several rather modern keybosrd from second hand shop. They are as cheap as $3
and worked perfect with my Macinmac except their looks. They are "Wide keyboard" with many
more keys such as number keys. What I wished is "Narrow keyboard" without number keys
and extra control keys, which I feel real old Mac.
After some research I found Happy Hacking Keyboard for Mac from Fujitsu. It looks similar
to the old one and function well as a modern Mac keyboad.
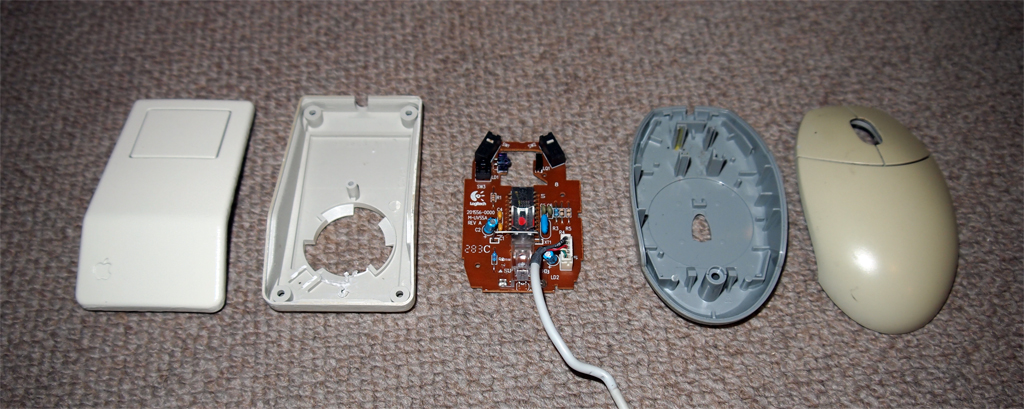
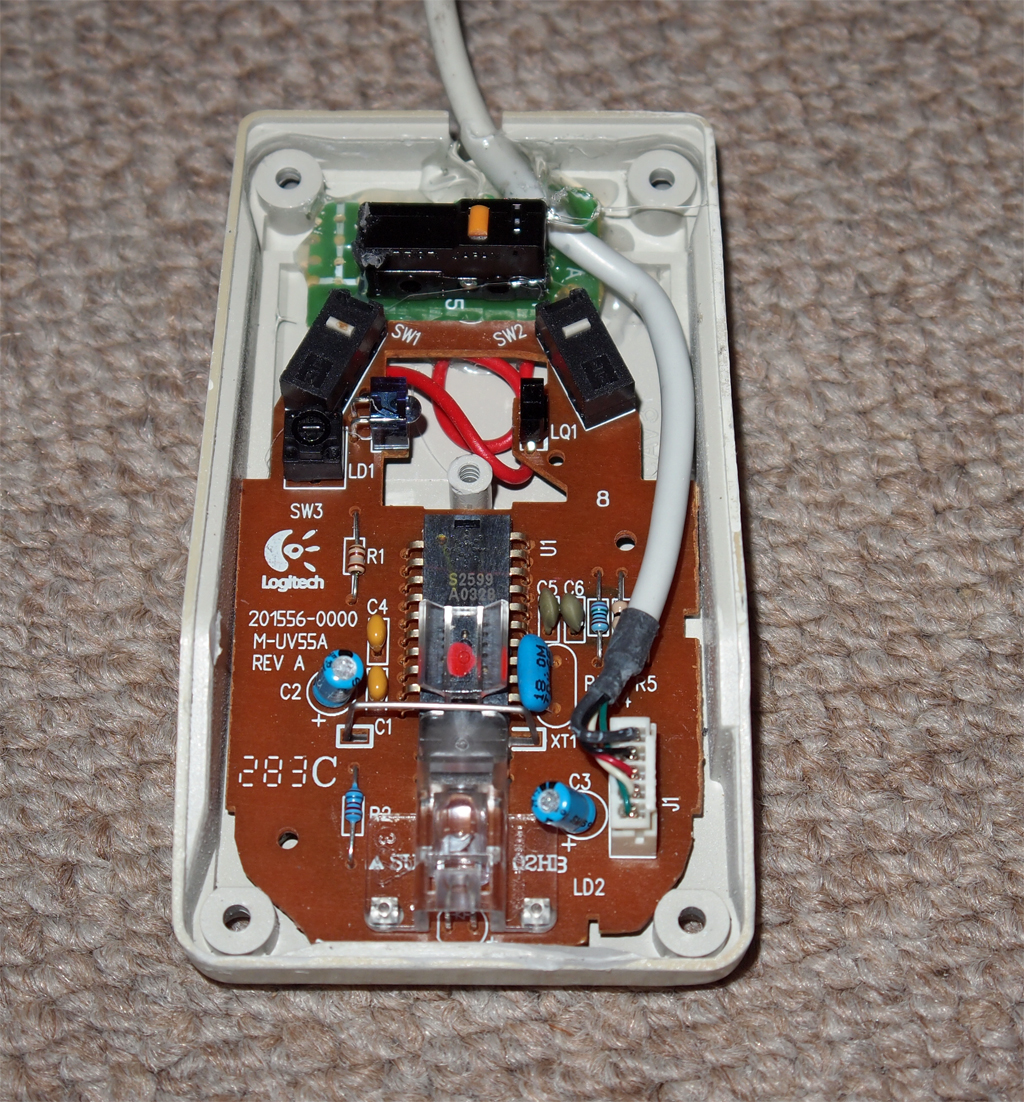
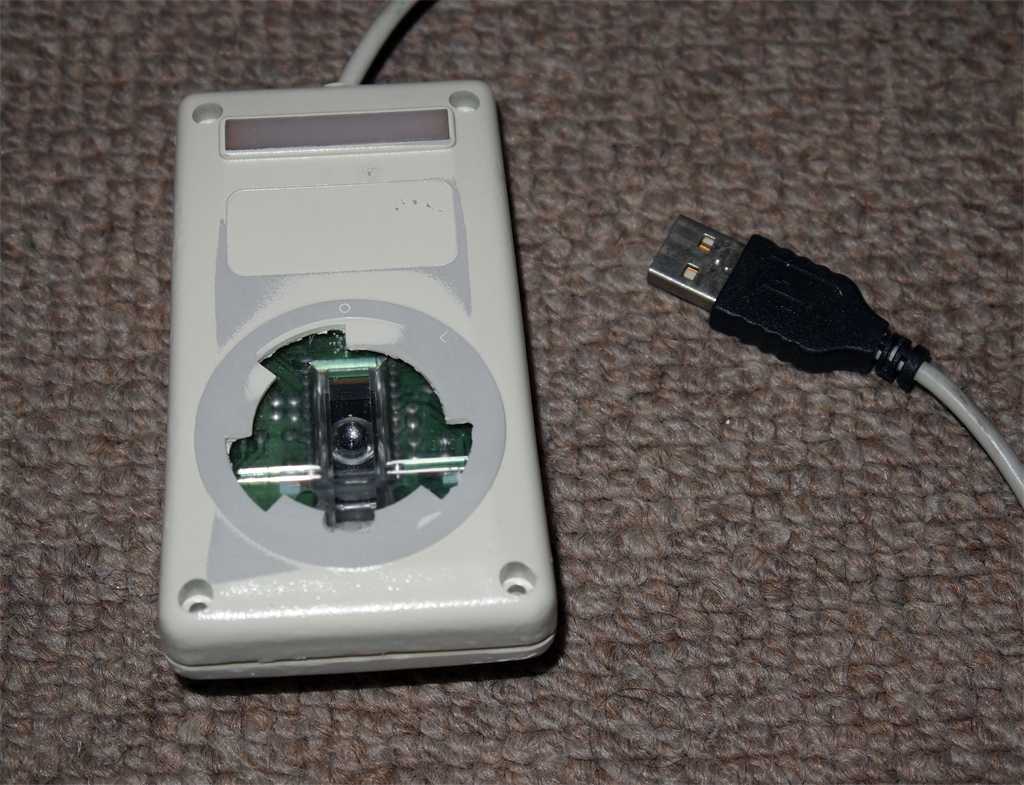
I bought old Mac mouse for another $3 and used the case and placed the mechanism and circuit board of
an optical USB mouse. It worked just fine except that the USB mouse was also bought for
another $3 and it is not a high resolution model.
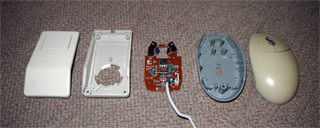 |
From the left, Apple mouse case, the circuti board of USB mouse and the case of USB mouse.
|
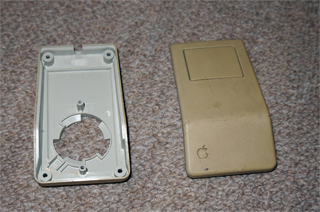 |
The first thihng I had to do is recovering the original color of the mouse. |
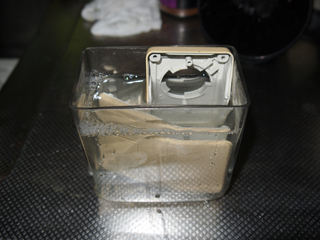 |
I put the case into bleach solvent for half an hour, but it did not do as I hoped. I did not expect much because the color change is from the deterioration of the plastic not from oxidation.
I needed to remove thin layer of the deteriorated plastic from the surface. I could not use sanding paper since it removes the finishes of the surface too. I used steel wire brush by hand and by trimmer.
|
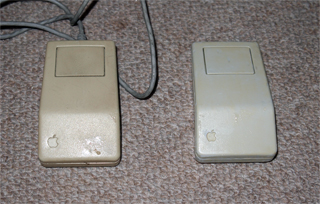 |
On the left is the mouse which was not badly deteriorated and the right is above mouse which has changed it's color into yellow and cleaned with wire brush. It still keeps the surface finish and the color became like new.
|
 |
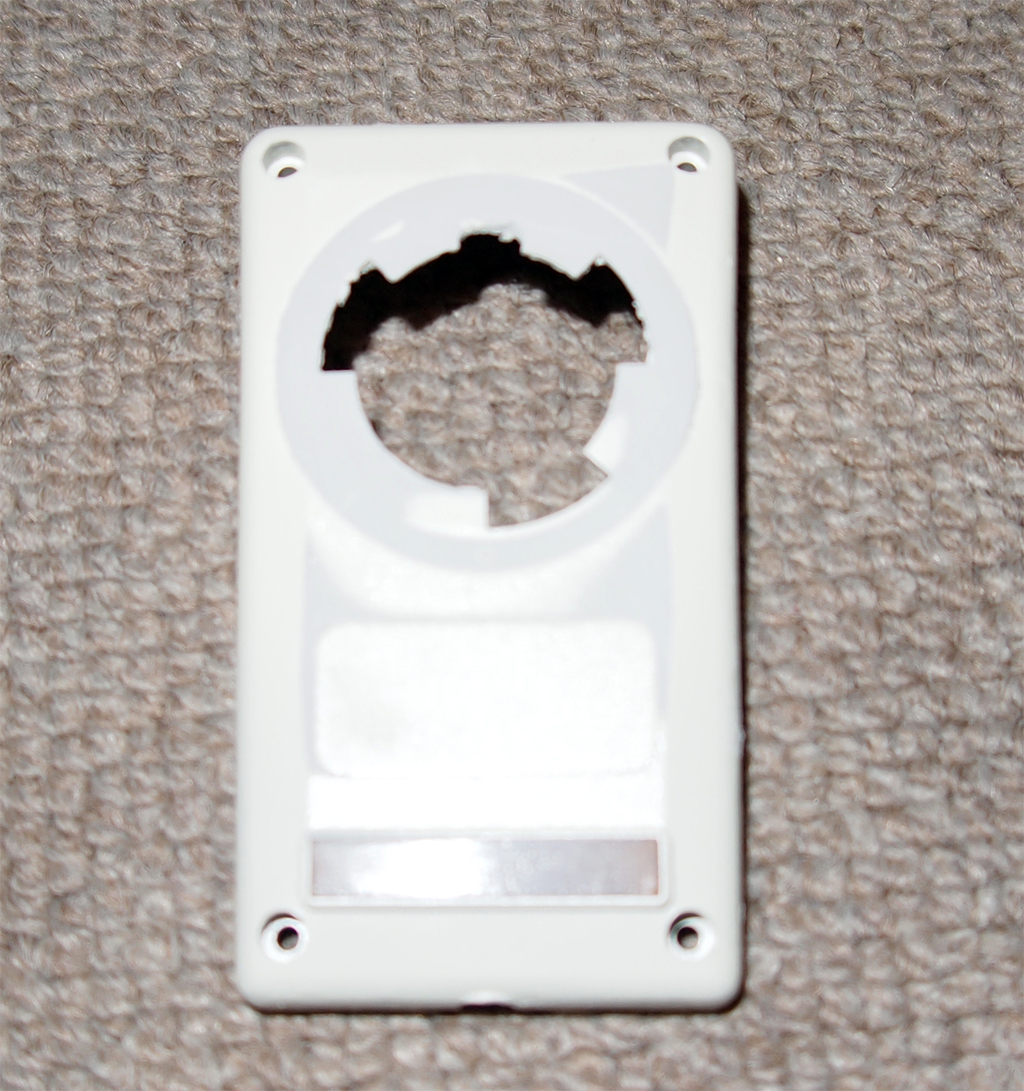
I founf the clearance between the surface of the desk and the bottome of the sensor is rather small and it is critical. I removed all portions above the base of the mouse.
|
 |
Above was not enough and I needed to removed the ring around the ball to get the right clearance. Later I put sliding sheet from original mouse to the surroundings of the hole and it did not affect the fucntion. |
 |
Left circuti board is going to be fit into the right bottome part of the mouse. The optical sensor comes to the original hole and I did not need to modify the bottom. |
 |
The mouse switch removed from the original one was soldered to PCB and fixed with hot melt. It was revealed that it is positioned too high and when top part is placed the switch was kept closed. I removed the pole under the mouse button and it worked fine.
|
 |
Circuit board nedded little modification to be fit and fixed with hotmelt. Original wheel were removd but switches were left as is since there is no chance that they are pressed. |
 |
Finished mouse bottome view.
I tell you the truth. Magic mouse is much better than this to operate the Mac.
|
| |
|
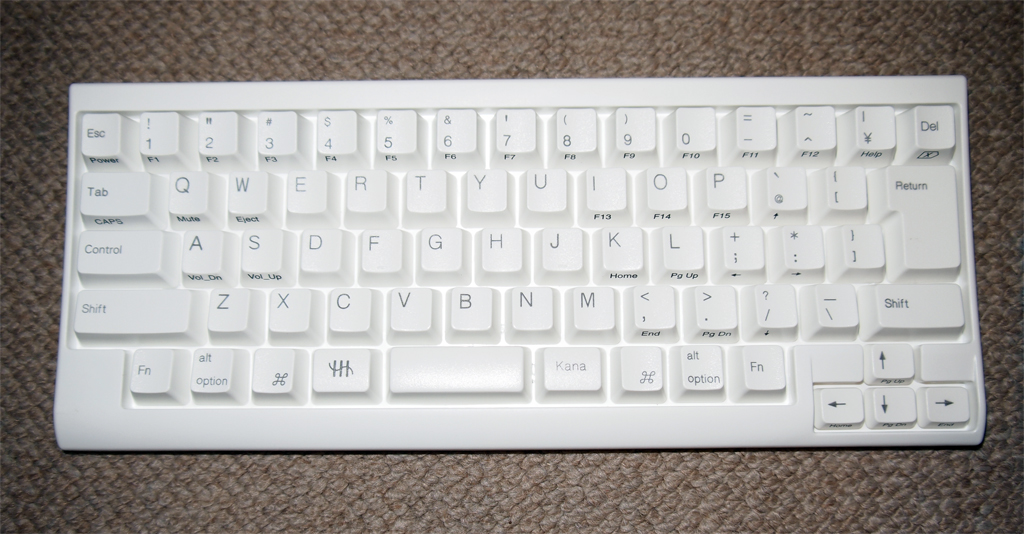
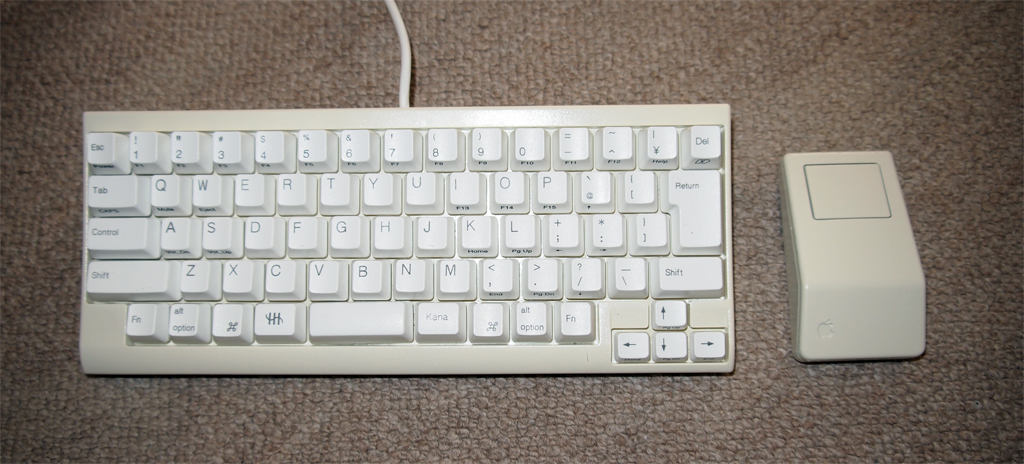
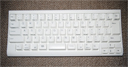
KEYBOARD
As I wrote above, I love narrow keyboard while Apple has been made many kinds of
keyboard for Macs including wide keyboard.
|
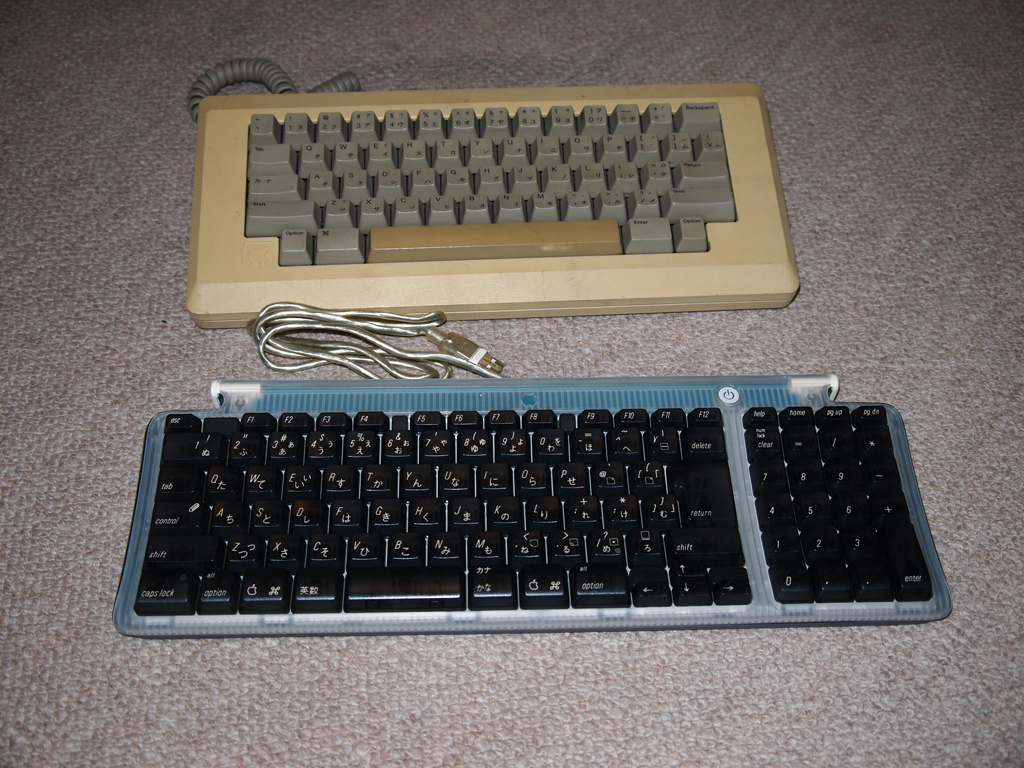
I found the original Macintosh keyboard in my warehouse. The blue one is bought for $3 at second hand shop nearby.
|
 |
Happy Hacking Keyboard for Mac and the original keyboard. It is acceptable except bright white color which might be good for Mac SE but not for first Mac. It must be painted.
|
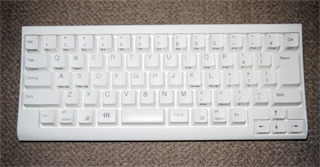 |
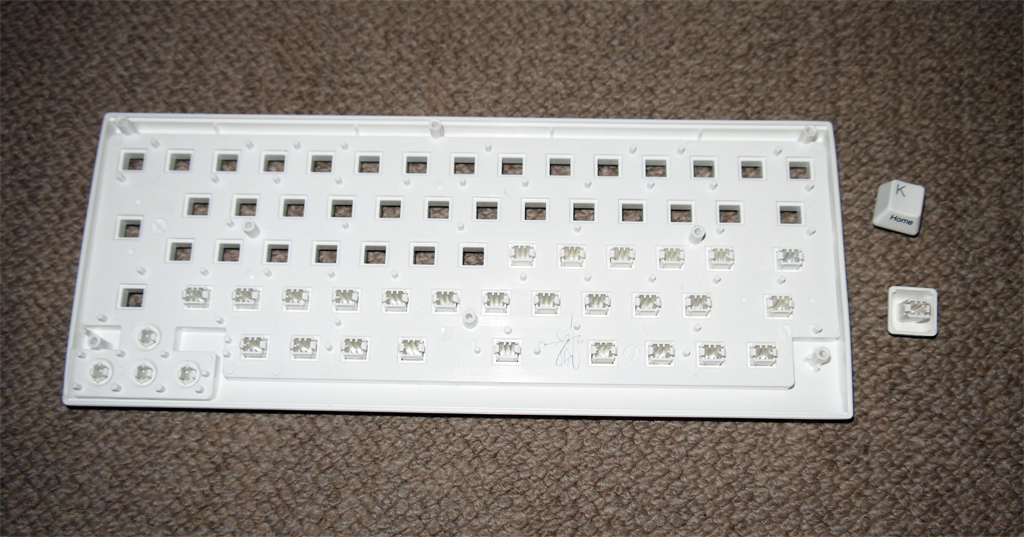
Keytops are impossible to paint and I painted the case only. This is not a critical problem since keytops in an original keyboard in above picture also has different color with it's case.
|
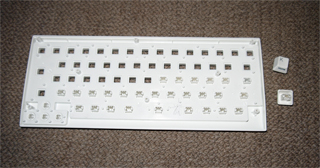 |
I disassembled the case and removed keytops from top cover.
|
 |
I bought two kinds of paint named beige from DIY store and tested them to find which one is closer to the body.
|
 |
I painted with a paint which seems to be similar to the original. However I found the result was sitll too bright and did not match. I tested the paint again and found that it looks better if I paint them in black first then in beige. In this case beige became more pale and closer to the original body.
One strange thing is I sprayed the paint light on the side of the body which is also discolored as mouse. The result was perfect, I could not tell which part was painted and which part was original.
|
| |
|
| |
|
| |
|
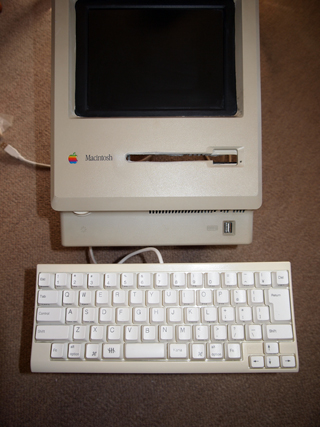
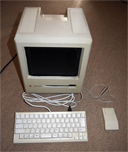
COMPLETED Macinmac
-

|
Now this is the finished Macinmac.
|
|
Rear view of Macinmac. |
 |
USB, power switch and AC inlet. |
 |
Self powered USB 2.0 ports, direct USB port from the Mac and LAN connector.
|
| |
|
| |
|
-
Copyright 2003-2011 TICKETS, All Rights
Reserved
これらの情報を使用した結果についての責任は負いかねます自己責任でご使用ください。
これらの情報は個人で使用される範囲において自由にご使用ください。
有償、無償に関わらず頒布目的で


